Best AI Photo Generator for Beginners in 2026
- Best Tools
- 8 min read
- Published: May 12, 2026
- Harish Prajapat
You opened five tabs. Midjourney, Stable Diffusion, some Reddit thread about samplers, a YouTube tutorial that’s 47 minutes long, and a pricing page with seven tiers. Then you closed all of them.
Yeah. That’s the beginner AI image generator experience in 2026, and it’s nonsense.
Here’s the truth. You don’t need to learn prompt engineering. You don’t need to pick a model. You don’t need to know what a CFG scale is or why anyone cares about seeds. You need a text box, a button, and a tool that doesn’t punish you for not reading the manual. That’s it.
This guide ranks the six easiest AI photo generators in 2026, shows you exactly how to make your first image in under five minutes, and flags the mistakes that quietly burn your free credits. Let’s get into it.
What to look for in an easy AI photo generator
Before the rankings, a quick sanity check. Most “best of” lists rank tools by raw image quality. That’s the wrong metric for beginners. The best beginner AI image generator is the one you’ll actually finish a project with.
Four things matter when you’re starting out:
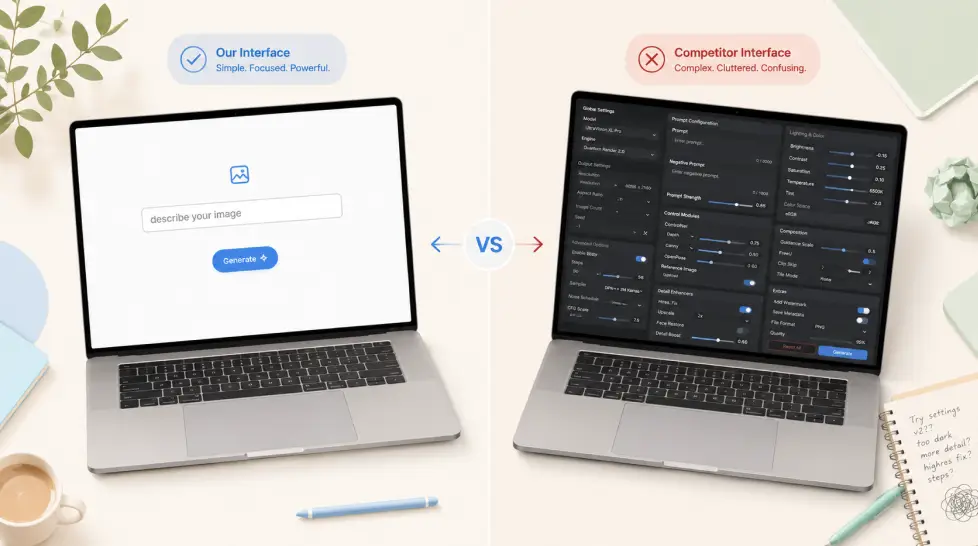
- One text box, not seventeen sliders. If the homepage shows you a control panel, run.
- Smart defaults. The tool should pick a good model, a sensible resolution, and a safe style automatically. You override later, when you care.
- Built-in fixes. Background remover, upscaler, face enhancer. Because your first image will need at least one of those.
- Generous free tier or transparent pricing. No hidden “premium model” upsell halfway through your first generation.
That’s the whole filter. Quality matters too, sure. But quality without usability just means you give up before you get anywhere.
Top 6 beginner-friendly AI photo generators, ranked
I tested each of these with the same three prompts. A photorealistic portrait. A product shot of a coffee mug. A cartoon of a dog wearing sunglasses. Same prompt, same expectations. Here’s how they actually performed for someone who’s never done this before.
1. MagicShot
The reason it’s first isn’t that I write here. It’s that MagicShot is the only tool on this list that doesn’t make you choose. You type your prompt, pick your favourite model, and it generates. Every model available on MagicShot including Nano Banana 2, GPT Image 2.0, and Seedream 5 Lite produces high quality images. No routing guesswork. No settings to configure. No model-switching headaches. You see your prompt. You pick your model. You get your image.
What makes it work for beginners specifically:
- Single subscription covers 56+ features, so when you’re ready to try video, headshots, or product photos, you don’t go shopping for another tool
- Templates for common needs (LinkedIn headshot, Instagram story, product listing) so you skip the blank-page panic
- Built-in editor, upscaler, and background remover, no exporting between apps
The downside? It’s not free forever. You get free credits to try, then plans start around the price of one a coffee per week. Fair, but worth knowing.
2. Canva Magic Media
If you already use Canva for anything, this is your easiest path in. With Magic Media and Create an image, powered by Dream Lab, you can quickly visualize ideas, sketch out creative concepts, or push the limits of what’s possible. The interface is the same Canva interface you already know, just with a text box.
Strengths: built into the design tool you probably use, decent quality, instant social media sizing. Weaknesses: limited free generations, the model isn’t as sharp as the dedicated image tools, and you’re locked into Canva’s editor for everything else.
3. Gemini (Nano Banana 2)
Google’s image generation lives inside the Gemini app and it’s genuinely good. With the latest image update, you can try any ‘do, instantly. Buffer’s 2026 testing flagged it as the most consistent overall performer. Nano Banana 2 was the most consistent performer overall. It nailed illustration accuracy, came closest to photorealism, and handled typography well.
For beginners it’s chat-style, so you describe what you want like you’re texting a friend. The catch is it’s a chat interface, not a creative workspace, so you can’t easily organize, edit, or iterate. Great for one-offs.
4. ChatGPT Images 2.0
Same idea as Gemini, different brain. Generate high-quality AI images quickly with ChatGPT Images, featuring precise edits, preset filters and trending prompts. If you already pay for ChatGPT Plus, you’ve got a capable image generator sitting inside the chat. Preset filters help beginners skip the style decision.
The trade-off is the same as Gemini. Conversational, not project-based. And the free tier is heavily rate-limited.
5. Leonardo.Ai
Leonardo sits in an awkward middle zone. It’s beginner-tolerant but not beginner-first. There’s a guided tutorial mode, you can pick a preset, and quality is genuinely high. But the dashboard still shows you negative prompts, model selection, image-to-image strength sliders. If you’re curious and willing to learn, it rewards you. If you want to make one image and move on with your day, it’s overkill.
6. Pixlr
Get creative with Pixlr’s online photo editing and design tools. Including AI image generator, batch editor, animation design, enhancer and more. Pixlr is photo-editor-first with AI bolted on, which is a different mental model from the others. Good if you came from Photoshop or wanted a free Photoshop alternative anyway. Less good if you literally just want to type words and see a picture.
Quick comparison
| Tool | Best for | Free tier | Learning curve |
|---|---|---|---|
| MagicShot | All-in-one beginners | Yes, credits | Very low |
| Canva Magic Media | Existing Canva users | Limited | Very low |
| Gemini | One-off chat-style images | Yes | Low |
| ChatGPT Images | Existing ChatGPT users | Limited | Low |
| Leonardo.Ai | Curious beginners willing to learn | Yes, daily credits | Medium |
| Pixlr | Photo-editing-first users | Yes, with watermark | Medium |
If you’re stuck choosing between these, this guide on picking the right AI image tool walks through the decision in more detail.
Why MagicShot works for beginners
Quick honest pitch. Then back to the practical stuff.
The reason most beginners quit AI tools isn’t quality. It’s friction. You generate an image, it’s almost right, but the background is busy and the face is slightly off. Now what? In most tools, you export, open another app, fix the background, open another tool, fix the face, re-upload, hope nothing broke. By image five you’re exhausted.
MagicShot keeps everything in one place. Generate with the AI Photo Generator, then fix it with AI Image Editing, remove the background, upscale, all without leaving the tab. When you’re ready to try video, the same subscription covers Kling Omni, VEO 3.1, Seedance 2.0, and Wan 2.6. Headshots, product shots, avatars, all included.
The pitch isn’t “it’s the best image model.” The pitch is “you’ll actually finish things.”
Your first AI image, step by step
Okay. Enough theory. Let’s make something. I’ll use MagicShot for this walkthrough but the steps translate to any of the tools above. If you want a longer beginner deep dive, this first AI image guide covers the same ground in more depth.
Step 1: Pick a goal, not a prompt
Beginners write prompts before deciding what they actually want. Reverse it. Decide first. “I need a header image for my newsletter about urban gardening.” Now you have a goal. Now the prompt writes itself.
Step 2: Describe four things
Subject, setting, lighting, mood. That’s your formula. Skip everything else.
Bad prompt: nice plant picture
Good prompt: A close-up of a tomato plant on a sunny apartment balcony, warm afternoon light, calm and inviting mood, photorealistic.
That’s it. No “masterpiece, 8k, ultra detailed, trending on artstation” nonsense. Modern models don’t need it.
Step 3: Generate, don’t tweak yet
Hit the button. Get four variations. Don’t refine the prompt yet. The first generation is a sanity check, are you in the right neighborhood?
Step 4: Iterate by editing, not re-prompting
This is the move most beginners miss. If your image is 80% right, don’t rewrite the whole prompt. Use image editing to change the one thing that’s wrong. Background too busy? Remove background. Wrong color? Edit. Face slightly off? Face enhancer.
Step 5: Upscale last
Always upscale at the very end. Once you’ve upscaled, further edits get expensive in credits and quality. Lock in your favorite version, then upscale.
That’s the entire workflow. Goal, four-part description, generate, edit, upscale. You can do it in five minutes.
Common beginner mistakes (and easy fixes)
Things that have wasted my time and probably yours too.
Mistake 1: Over-describing the prompt
Adding twelve adjectives doesn’t help. OpenArt uses advanced AI to interpret your textual prompts and convert them into visual art. Modern models read your prompt like a sentence, not a keyword list. Three sentences beats thirty keywords every time.
Mistake 2: Generating ten times before fixing the prompt
If your first three generations are wrong, the prompt is wrong. Don’t keep rolling the dice. Read what the model gave you, figure out what it misunderstood, fix that one thing.
Mistake 3: Ignoring aspect ratio
Square images for vertical Instagram stories. Portrait images for horizontal banners. Decide the aspect ratio first, before the prompt. Saves a regeneration.
Mistake 4: Burning credits on draft quality
Most tools have a draft or fast mode. Use it for exploration, switch to high quality only when you’ve nailed the composition. People skip this and run out of credits in an afternoon.
Mistake 5: Skipping the editor
The biggest one. People generate, hate the result, regenerate, hate it again, give up. The fix was always editing, not regenerating. AI tools are 70% generation and 30% editing for a reason.
[IMAGE: Before and after split-screen showing a generated image of a coffee mug with messy background on the left, then the same mug on a clean white background with professional lighting on the right, e-commerce product photography style]
Mistake 6: Treating one tool as the final answer
You don’t have to commit forever. Try two tools for a week. Pick the one that frustrates you least. That’s your tool. The image quality differences between top players in 2026 are smaller than the workflow differences.
What to do this week
Pick one tool. Just one. Generate ten images using the four-part formula (subject, setting, lighting, mood). Edit them. Don’t share them, don’t post them, don’t show anyone. Just learn the rhythm.
Week two, start a real project. A header for your blog. A product photo for your shop. A profile picture. Something with a finish line.
That’s how you go from “AI photo generator looks confusing” to “oh, I just made that” in under fourteen days. Not because you became a prompt wizard. Because you stopped overthinking it.
The tools are ready. They’ve been ready for a while. The only question is whether you’ll open one and start typing.
Frequently Asked Questions
MagicShot, Canva Magic Media, and Google’s Gemini app are the three friendliest starting points in 2026. They all hide the technical settings behind a single text box, give you sensible defaults, and let you generate your first image without picking a model, sampler, or resolution. If you want one all-in-one tool that also covers video, headshots, and product photos later, MagicShot is the easiest place to grow into.
Not really, not in 2026. Modern models like Nano Banana 2, GPT Image 2.0, and Seedream understand normal sentences. You’ll get better results if you describe the subject, the setting, the lighting, and the mood in plain English, but you don’t need keyword stuffing or weird negative prompts anymore. Most beginner tools also have prompt suggestions or rewrite buttons that fix vague descriptions for you.
For learning and casual use, yes. Free tiers from tools like Canva, Pixlr, or Gemini will get you started. But you’ll hit limits fast, watermarks, slow queues, daily caps, and missing features like upscaling or background removal. A cheap paid plan around $10 to $30 a month removes those friction points and usually unlocks better models, which matters more than any prompt trick.
A generator creates a brand-new image from text or a reference. An editor changes an existing photo, removes backgrounds, swaps outfits, fixes faces, that kind of thing. Beginners usually need both. MagicShot bundles them together so you can generate an image, then edit it, upscale it, or turn it into a video without exporting and re-uploading anywhere.
Most paid tools grant commercial rights to images you generate on their platform, but always check the specific terms. Free tiers sometimes restrict commercial use or add watermarks. If you’re using images for a client, an ad, or a product listing, stick to a paid plan and keep the platform’s license terms saved somewhere. Avoid prompts that name living artists or specific brands, that’s where ownership gets messy.